
Why Cleaning Lint from Your Dryer Duct Matters for Your Home
Cleaning lint from your dryer duct is a critical home maintenance task that keeps your family safe from fire hazards while improving your dryer’s efficiency. Here’s what you need to know:
Quick Answer: How to Clean Your Dryer Duct
- Unplug the dryer and turn off the gas valve (if applicable)
- Pull the dryer away from the wall to access the vent hose
- Disconnect the vent hose from both the dryer and wall duct
- Use a dryer vent brush or cleaning kit to remove lint from the hose and wall duct
- Clean from both ends – inside and at the exterior vent opening
- Vacuum all debris and reconnect everything securely
- Run a test cycle to ensure proper airflow
You clean the lint trap after every load, but what about the hidden danger lurking in your walls?
Forgetting to clean the entire dryer vent system is a common oversight that can have serious consequences. According to the U.S. Fire Administration, thousands of home fires each year are caused by dryers, and the leading cause is failure to clean the vent system.
Beyond the fire risk, a clogged vent forces your dryer to work harder. This means longer drying times, higher energy bills, and premature wear on your appliance. If your clothes are taking multiple cycles to dry or your dryer feels hot to the touch, lint buildup is likely the culprit.
This guide will walk you through everything you need to know to safely and effectively clean your dryer duct, protecting your Portland home and family.

Why a Clogged Dryer Vent is a Major Home Hazard
Lint buildup is a major fire risk. According to the National Fire Protection Association, dryers are one of the leading causes of home fires, and excess lint is often the culprit. Between 2010 and 2014, US fire departments responded to over 15,000 home fires involving clothes dryers, with 27% resulting from dust, fiber, or lint. This isn’t just a statistic; it’s a stark reminder that neglecting cleaning lint from your dryer duct can have disastrous consequences for your home and loved ones.
Lint is made up of tiny fibers that come away from your clothing during the drying process. These fibers are incredibly dry and highly flammable, igniting from even the smallest spark within your dryer’s heating element or motor. When lint accumulates in the dryer duct, it restricts the airflow, causing hot air to build up inside the dryer. This overheating can quickly lead to a fire. The U.S. Consumer Product Safety Commission reported that electric dryers were more than twice as likely as gas dryers to be the cause of fire in a study of 15,000 fires, highlighting the danger regardless of your dryer type.
Beyond the immediate fire hazard, a clogged dryer vent severely impacts your dryer’s performance and your wallet. When airflow is restricted, your dryer has to work much harder and for longer periods to dry your clothes. This leads to:
- Increased Energy Consumption: Your dryer becomes less efficient, spiking your energy costs. A clean dryer vent contributes significantly to energy savings by allowing your appliance to operate as intended.
- Longer Drying Times: What used to take one cycle might now require two or three, wasting your precious time and electricity.
- Premature Wear and Tear: The extra strain on your dryer’s components due to overheating can lead to breakdowns and shorten the lifespan of your appliance. This means more expensive repairs or needing to replace your dryer sooner than necessary.
- Mold and Moisture Problems: Restricted airflow can cause moisture to accumulate in the vent system, creating a breeding ground for mold and potentially affecting your indoor air quality.
- Carbon Monoxide Buildup (for gas dryers): For gas dryers, a blocked vent is particularly dangerous as it can prevent harmful carbon monoxide gases from venting outside, causing them to back up into your home.
Regularly cleaning lint from your dryer duct isn’t just about maintenance; it’s about safeguarding your family, optimizing your appliance’s performance, and saving money on utility bills and potential repairs.
Signs Your Dryer Vent is Clogged
We’ve all been there – tossing a load of laundry into the dryer, only to find it still damp an hour later. That’s often your dryer trying to tell you something! Recognizing the warning signs of a clogged dryer vent early can prevent serious issues. Here are the key indicators:

- Clothes take multiple cycles to dry: This is one of the most common and frustrating signs. If your clothes require repeated cycles or significantly longer drying times than usual, it’s a strong indication that lint is restricting airflow.
- The dryer is hot to the touch: If the top of your dryer feels unusually hot after a cycle, it means heat is building up inside the appliance because it can’t escape through the vent.
- You notice a burning smell: A faint, charred scent, especially during a drying cycle, is a critical warning sign. This smell often indicates lint is overheating or starting to burn within the ductwork.
- Lint is visible around the exterior vent: If you can see lint accumulation around the outside opening of your dryer vent, you can bet there’s a lot more inside the duct.
- The vent flap doesn’t open when the dryer is on: The exterior vent flap should open when the dryer is running to allow hot air and moisture to escape. If it remains closed or barely opens, airflow is obstructed.
- Your dryer overheats and shuts off: Many modern dryers have safety features that automatically shut down the appliance if it gets too hot. If your dryer frequently stops mid-cycle, a clogged vent is a likely culprit.
- Excessive lint on clothes: If your clothes come out with more lint on them than they went in with, it suggests the lint trap isn’t working effectively or the overall system is backed up.
- Moisture in the laundry room: A clogged vent can cause steam and humidity to back up into your laundry area, leading to a noticeable increase in moisture.
If you observe any of these signs, it’s time to take action and consider cleaning lint from your dryer duct.
A Step-by-Step Guide to Cleaning Lint from Your Dryer Duct
Cleaning lint from your dryer duct might seem daunting, but it’s a straightforward process that you can tackle yourself with the right tools and a little patience. This project typically takes about an hour or less for a beginner. Let’s get started!
Step 1: Gather Your Tools and Materials
Having everything you need on hand before you start will make the process much smoother. We recommend using a specialized dryer vent cleaning kit for the most effective results.

Here’s what we’ll need:
- Dryer cleaning kit: This typically includes a long, flexible brush or a rotary brush that can attach to a drill, along with extension rods to reach deep into your ductwork. We find these kits to be incredibly effective.
- Vacuum cleaner with hose attachment: A powerful shop vac (A shop vac could work well too!) is ideal for sucking up loose lint, but a standard vacuum with a good hose will also do the trick. The kit usually comes with a good nozzle for this purpose.
- Screwdriver or nut driver: You’ll need this to loosen and tighten the clamps on your dryer vent hose.
- Sturdy gloves: To protect your hands from dust and sharp edges.
- Dust mask: Essential for protecting your lungs from airborne lint and dust particles.
- Flashlight: To help you see into dark crevices and ductwork.
- Microfiber cloth: For wiping down surfaces.
- Foil tape or worm gear clamps: To secure your ductwork if needed during reassembly.
Step 2: Safety First – Prepare the Area
Safety is paramount when working with appliances. Before you begin any work on your dryer or its vent, we must ensure it’s completely safe.
- Unplug the dryer: Locate the dryer’s power cord and unplug it from the wall outlet. This eliminates any electrical hazard.
- Turn off the gas valve (if you have a gas dryer): If your dryer is gas-powered, you’ll need to locate the gas supply valve behind the dryer and turn it to the off position. The valve handle should be perpendicular to the gas pipe when off. This prevents gas leaks.
- Move the dryer: Carefully pull the dryer away from the wall. This will give us enough space to access the back of the appliance and the wall vent opening. It’s often helpful to have another person assist with moving the dryer, especially if it’s heavy or in a tight space.
These crucial steps protect you from electrical shock, gas leaks, and provide the necessary working room.
Step 3: Clean the Lint Trap and Disconnect the Vent Hose
Even though you clean your lint trap after every load (we hope!), there’s always some lint that gets past. This step addresses that.
- Clean the lint trap and its compartment: Remove the lint screen from its slot. While you regularly pull off the visible lint, use your vacuum’s hose attachment to thoroughly clean out the lint trap housing inside the dryer. Many dryer cleaning kits include a narrow brush or attachment specifically designed to reach down into this compartment and remove hidden lint. Use a wire brush to loosen any hidden lint inside the lint trap compartment, then vacuum it out.
- Disconnect the vent hose: Next, locate the flexible vent hose connecting the back of your dryer to the vent duct in the wall. You’ll typically find a clamp (either a screw clamp or a spring clamp) securing the hose at both ends. Use your screwdriver or nut driver to loosen these clamps. Once loosened, gently pull the hose free from both the dryer’s exhaust port and the wall duct. Be careful not to damage the hose or the ports. If you have a soft foil-style vent hose, now is a great time to consider replacing it with a rigid or semi-rigid metal duct, as the foil-style ones are considered a fire hazard.
Step 4: The Main Event – Cleaning Lint from Your Dryer Duct
This is where we tackle the biggest culprit for dryer inefficiency and fire hazards: the lint buildup within the ductwork itself.
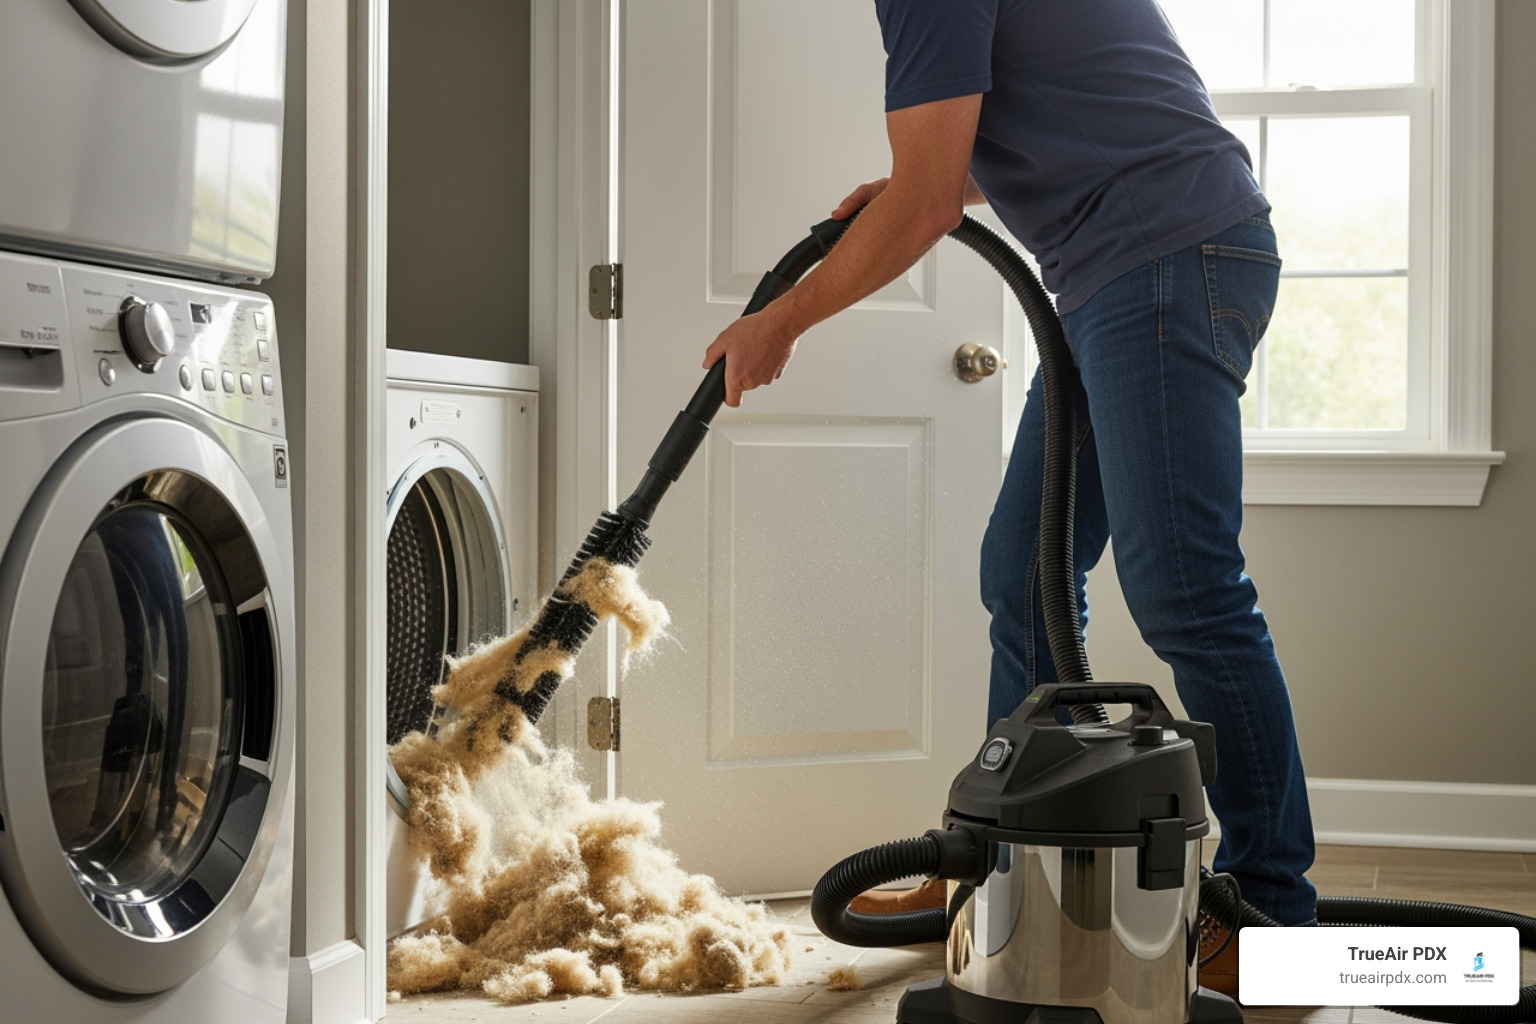
- Clean the flexible vent hose: Take the disconnected flexible vent hose outside or to a well-ventilated area. Using your dryer vent cleaning brush (or the brush from your kit), push it through the entire length of the hose, rotating it as you go to dislodge lint. You’ll be surprised by how much lint comes out! Vacuum up all the loosened lint from inside the hose. We’ve seen some hoses so packed with lint, it’s like a furry snake!
- Clean the dryer duct inside the wall: Now, turn your attention to the duct opening in the wall. Insert your dryer vent brush into the duct. If you’re using a rotary kit that attaches to a drill, connect the rods and the brush head. Start your drill on a low, forward speed (never reverse while inside the duct!) and slowly push the brush further into the duct. The rotating brush will effectively scrape and loosen accumulated lint from the duct walls. Continue adding extension rods as needed to reach as far as possible. Pull the brush out periodically to remove the loosened lint, then reinsert it.
- Clean from the exterior vent opening: For a thorough cleaning, we also need to clean from the outside. Locate your dryer’s exterior vent cover on the outside of your home (usually on a side wall or sometimes on the roof). Remove the cover. Repeat the process from step 2, inserting your dryer vent brush with extension rods into the exterior vent opening and pushing it inward. This helps ensure that lint is dislodged from both directions.
- Vacuum remaining debris: After brushing from both ends, use your powerful vacuum cleaner with a hose attachment to thoroughly suck out any remaining loose lint and debris from both the wall duct opening (inside) and the exterior vent opening. A shop vac works particularly well here.
The goal is to remove every last bit of lint to restore optimal airflow.
Step 5: Clean the Exterior Vent and Reassemble
We’re almost there! This final step ensures everything is put back together correctly and safely.
- Clean the exterior vent: With the exterior vent cover removed, clean away any lint or debris that has collected around the opening and on the cover itself. Ensure that any flaps or louvers on the vent cover move freely and aren’t stuck with lint. We recommend using soapy water to clean the cover if needed.
- Install a vent guard: While the exterior vent is open, this is an excellent opportunity to install a vent guard. A vent guard is a mesh cover that prevents small animals, birds, and pests from nesting inside your dryer vent, which can cause significant blockages. Just make sure it doesn’t impede the airflow or the vent flap’s operation.
- Reassemble the system:
- Reattach the exterior vent cover, ensuring it’s securely fastened.
- Back inside, reattach the flexible vent hose to both the dryer’s exhaust port and the wall duct. Make sure the connections are snug and secure, using your screwdriver to tighten the clamps firmly. Loose connections can lead to lint escaping into your home or reduced efficiency.
- If you had a gas dryer, turn the gas supply valve back to the “on” position (the handle should be parallel to the gas pipe).
- Plug your dryer back into the electrical outlet.
- Carefully push your dryer back into its original position against the wall.
- Test the dryer: Run a short, empty air-dry cycle (10-15 minutes) to test the airflow and ensure everything is working correctly. Check the exterior vent to confirm that air is flowing out freely. This also helps to push out any residual lint that might still be lurking.
Congratulations! You’ve successfully completed the process of cleaning lint from your dryer duct. We bet you feel a sense of accomplishment and peace of mind!
Frequently Asked Questions about Dryer Vent Cleaning
We often get questions about dryer vent cleaning, and we’re happy to share our expertise to keep your home safe and efficient.
How often should a dryer vent be cleaned?
For the average household in Portland, a thorough cleaning lint from your dryer duct is recommended at least once a year. This helps prevent dangerous lint buildup and maintains efficiency. However, the frequency can vary based on several factors:
- Household size and laundry volume: If you have a large family or do several loads of laundry per week (more than 3-4 loads), we suggest cleaning your vent every six months.
- Pets: Homes with pets tend to accumulate more lint due to pet hair, so a semi-annual cleaning is often a good idea.
- Dryer age and type: Older dryers or those with less efficient lint traps might require more frequent cleaning.
- Vent length and configuration: Longer vent runs or those with multiple bends can accumulate lint faster and should be cleaned more frequently.
Pay attention to the signs of a clogged vent we discussed earlier. If you notice any of them, it’s time to clean, regardless of when you last did it.
Can I perform a cleaning without moving the dryer?
You can certainly attempt to clean the dryer duct from the exterior vent opening, which will remove some of the lint. You can use your dryer vent brush with extension rods to reach in as far as possible. However, this method is often incomplete.
To do a truly thorough job and ensure all lint is removed from the flexible hose (the part directly behind the dryer) and the connection point at the back of the dryer itself, you absolutely must move the appliance away from the wall. We find that the most significant lint accumulation often occurs right at the dryer’s exhaust port and in the initial bends of the flexible hose. Cleaning only from the outside leaves these critical areas untouched, meaning you haven’t fully addressed the fire risk or efficiency issues.
What should I do if I encounter a blockage I can’t clear?
During your DIY cleaning efforts, if your cleaning brush hits a hard stop that won’t budge, or you can’t push it through a certain section of the duct, you likely have a compacted clog, a damaged duct, or even an animal nest. Do not force the brush, as you could damage the ductwork, potentially creating a bigger problem or even a safety hazard.
This is a clear sign that it’s time to call a professional. Here are some other signs that a dryer vent needs professional cleaning:
- Persistent or severe clogs: If you’ve tried DIY cleaning and your dryer is still showing signs of a clog.
- Very long or complex vent runs: Ducts that are exceptionally long or have many sharp turns are much harder for DIY tools to steer effectively.
- Damaged or improperly installed ductwork: Professionals can identify and address issues like crushed hoses, disconnected sections, or incorrect materials.
- Animal infestations: If you suspect an animal has nested in your vent, professionals have the tools and expertise to safely remove them and clean the area.
- Gas dryer concerns: While you can turn off the gas yourself, a professional can also check for gas leaks during their service, offering an extra layer of safety.
- You simply prefer peace of mind: Sometimes, it’s worth it to know the job is done right by experts.
When you encounter a blockage you can’t clear, or if you prefer not to tackle the job yourself, don’t hesitate to reach out to professionals.
Keep Your Home Safe and Efficient
Regularly cleaning lint from your dryer duct is one of the most important home maintenance tasks you can perform. It drastically reduces your risk of a house fire, lowers your energy bills, and extends the life of your dryer. By ensuring proper airflow, your dryer works more efficiently, drying clothes faster and preventing unnecessary strain on its components.
While DIY cleaning is effective for routine maintenance, some situations truly benefit from expert attention. If you encounter a stubborn clog, have a very long or complex vent run, or simply want the peace of mind that comes with a professional job, TrueAir PDX offers expert Dryer Vent Cleaning services in Portland, Gresham, Beaverton, Tigard, Milwaukie, and surrounding areas. Our local, trusted, and eco-friendly team uses specialized equipment to ensure your dryer vent system is thoroughly cleaned, reducing fire risk and promoting a safer home environment for you and your family in the greater Portland area. Protect your home and family by ensuring your dryer vent is clear and safe. Get a Free Quote today!